6 Customized page
Introduction
This module explains how to create a custom page in a book.
Watch the video Bloom: How to Customize a page https://vimeo.com/channels/bloomlibrary/116868148
(Bloom_custompage-SD.mp4).
6.1 Starting Bloom
- Double-click the Boom icon on the desktop.
- The main window appears.
6.2 Choose a collection
Make sure the correct collection is open.
If not, click on Other collections.
The Open/Create Collection dialog box appears.
- Select the desired collection.
The main window reappears.
- Select the desired collection.
6.3 Creating a Book
- In the Sources for New Books pane, click Basic Book.
- Click on Make a book using this source.
- On the Fron Cover page, enter a title
6.4 Customizing a Page - Changing Size
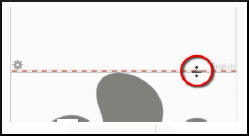
You can change the size of text and image parts by dragging the dividing line between them.
6.5 Customizing a Page - Adding Parts
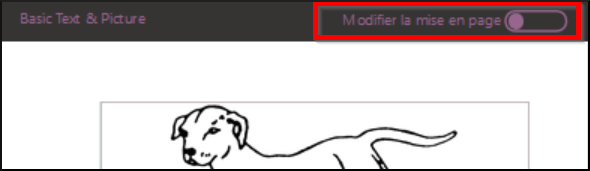
Right click on the Edit Layout button.
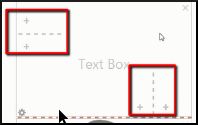
Use the + symbols to add new parts.
Tell Bloom whether you want to have an image or text in this field.

Click on the Edit Layout button on the left.

6.6 Creating a Custom Page
To create a custom page, click Add Page,
Select Customize,
Then click Add this page.
A custom page is displayed and is ready to be edited.
6.7 Define Page
- Use the + symbols to add new parts.
- Click X to remove parts.
- Tell Bloom if you want a picture or text in this part.
- Click on the Edit Layout button on the left to set the layout